Our newest series, Hometown Holiday, revolves around pieces that are made into cubes with NO sewing or glue. The following is my own step-by-step process that can help you if you've never made a cube before. Read all of the directions and take a good look at the photos before beginning. Now let's get started!
Some of the supplies
Supply list: Styrofoam (I used 1-3/4"), backing fabric, flat pins, ball head pins, long dressmaker pins (I used size 20, 1-1/4"), flat bottom beads for the feet, iron, cutting mat and rotary cutter and a pair of scissors.
To Begin: Measure the finished design and add a margin amount to the measurement. A half inch or so to all sides is good. Cut your styrofoam this size.
Trimmed design
Trim: Trim the excess fabric from your stitched design.
Do this by centering the design over the cube and gently folding the unstitched area to all four sides. Mark the excess (the area that extends beyond the cube itself) with pins then trim to the inside of the markings 1/4" to 1/2". The raw edge will get cover so don't worry too much about accuracy and neatness.
Preliminary pinning
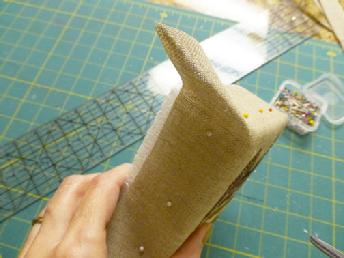
Pin: Center your design onto the Styrofoam then pin in place using the ball head pins. I found these are the easiest to remove and replace after you get the design where you want it. Once you satisfied you can replace the ball head pins with flat pins, pushing them in deeply so they don't protrude.
Finger press the fabric corners to the sides of the cube. Pin in place using the flat head pins. (See below).
Pinning corner
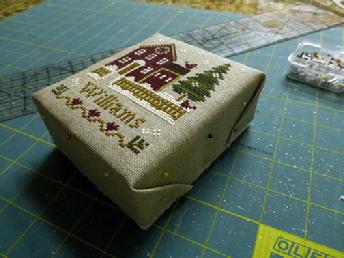
All corners pinned
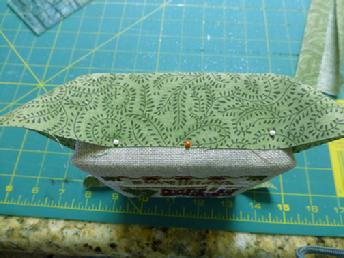
Pinning back fabric
Backing Fabric: Cut the fabric for the back of the cube in the same way you did the front.
Pin in place with ball head pins first, then replace with flat pins.
Again, the raw edge will be covered.
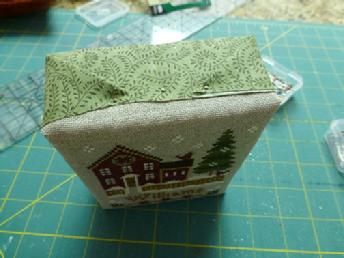
Pinning Corners
Pinning: Once you have pinned the fabric, create the corners the same way you did for the design only this time, place them on the top and bottom of the cube. This reduces bulk so that not all of the corners end up on only two side of the cube. Your fabric, if it is a quilt-weight cotton should lay nicely with a simple finger press.
Cut the side strip
The side band of fabric: Measure the width of the cube. Multiply that measurement by 2. If you bought a 1-3/4" wide piece of styrofoam your strip width would be 3-1/2" x the distance around the cube plus 1/2". For this cut I used my rotary cutter and mat.
Press
Creating the side band: With the right side of the fabric down, fold one long edge to the middle and press the length. Determine the width needed for the band (it should be slightly less in width than the actual measurement of the cube so that it doesn't hang outside the design). Fold the second long side to the center to the width you have determined and press again.
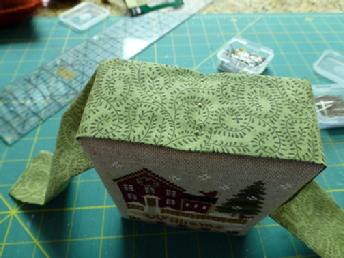
Pinning the side strip
Pinning the strip: Determine the center of the length of the strip and pin to the top center of the cube. Wrap the strip around the cube pulling tightly as you go. Pins can be used to hold it in place.
Bottom pinned
Pinning the bottom of the strip:When you arrive at the bottom, turn both raw edges to the underside while overlapping the pieces. Use flat pins to secure.
Ribbon
Ribbon Wrap: Choose the ribbon you wish to "wrap" your package in. I used one pin at the top to hold both cut ends. Your ribbon can be larger than the one shown or eliminated altogether.
Bow
The bow: The type of ribbon I chose was not the most forgiving as far as twisting went so I created a simple loop styled bow instead. The pin in the center anchored all of the layers. If you use this method be sure you have enough loops to make it full.
Bead Feet
Beaded Feet: The beads I found at Michael's had flat bottoms and were perfect. Between the beads were small seed beads that I used as well. Thread the seed bead and then the flat bead onto the long dressmaker's needle and push into the bottom of the cube.